
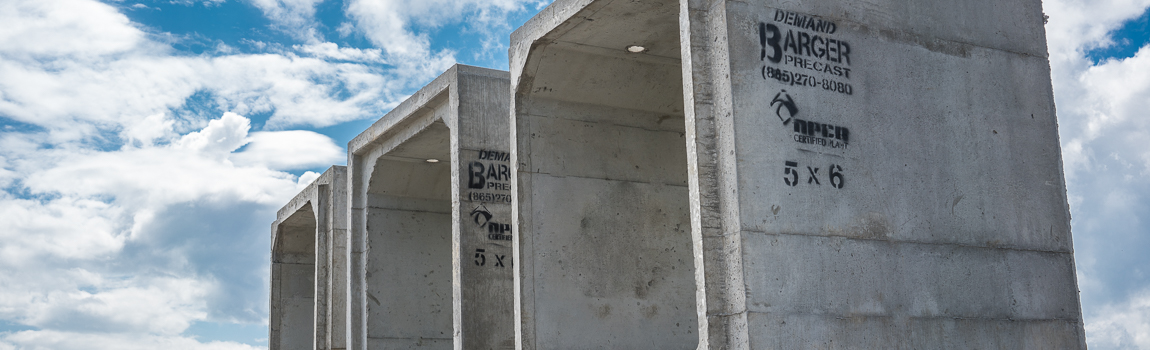
Box Culvert Sealing Guide
To properly understand the best method of sealing the joint of a precast concrete product, some of the myths and misconceptions about sealants must be discussed. Laboratory testing and engineering analysis has lead to some "rules of thumb" when selecting and applying preformed butyl rubber sealants in a compression joint.
Definitions
Sealant Selection
Materials
Sealants are typically designed to resist hydrostatic forces at a precast concrete joint to provide a watertight seal. The American Society of Testing and Materials (ASTM) specification C990 defines the required composition and performance testing requirements for preformed butyl sealants. Sealants that meet this standard will provide a reasonable level of assurance for performance in a hydrostatic conditions. Butyl rubber content and hydrocarbon content are synonymous terms.
Shape
A traditional misconception of preformed sealants is that wider is better. That is a myth. Preformed butyl rubber sealants work best at higher rates of compression. As the sealant is compressed, the resistance force for further compression increases as a function of the percentage of compression. Time and temperature, as well as the sealant composition, will affect this rate. For instance, the force (psi) to compress the sealant the initial 10% to 50% may range from 2psi to 4psi. But as the sealant reaches 75% compression, the resistance force is about 8psi, and at 85% compression, this reaches a force of about 12psi. As the sealant is compressed, the sealing gasket increases in width as it becomes thinner. This width increases the surface area of the applied force. As the area reaches a point of equilibrium with the designed resistance force of the sealant, compression will stop. The analogy best used is the use of snow shoes. As the area of the applied force is increased, the force per square inch is reduced. Thus enabling a person to walk on top of the snow.
Size / Volume
How much sealant is needed to seal the joint? The answer is as varied as the types and sizes of concrete castings being produced. There is no magic answer. Too little sealant may cause the joint to leak; too much sealant will be difficult to compress. The size of sealant required is determined by the volume needed to fill enough of the void to eliminate the possibility that a hydrostatic force will "push" the sealant. A minimum gasket width in the joint of 2"-3" is common, but a wider band is preferred. A maximum joint gap of 3/8" is recommended, but it is preferred that the joint be as tight as possible. A rule of thumb for finding the width after compression is to use this formula: (TF/P)/100, where TF=Total force applied in pounds, P=the length of the entire perimeter in feet. Example: 15,000 pounds of force is applied to a rectangular casting 10' x 5'. The perimeter is 30 feet. Calculate: (15,000/30)/100=5 Therefore, the sealant will compress to a nominal width of about 5". For box culverts, the net force must be determined by subtracting the force required to move the concrete section from the total force.
Placement
Sealant placement is critical in providing the best, water tight joint. Best practices are to place sealant in or near the annular space. On a box culvert, the best practice is to place some of the sealant on the bell in the angled surface along the bottom, and 6" above the center on each side. Continue placing the sealant on the spigot end of the mating piece on the angled surface along the top, and 6" below the center on each side.
Adhesion
The adhesion of the sealant to the concrete affects the hydrostatic resistance. Water can pass by sealant through the concrete by absorption if the joint surface is not properly prepared. This will result in wetness in or near the joint, opposite of the side of the joint where water is present. Sealant will adhere to a clean, dense, well cured concrete surface. To improve adhesion, primers can be used to create a surface that the sealant will adhere to. Primers can be in several forms: solvenated rubbers, glues, acrylics, or penetrating sealers. The manufacturer of the sealant can provide options that are best for the condition being treated.
Definitions
- Compression Joint: A surface between two mating concrete sections where force is to be applied to compress the sealant material.
- Preformed sealant: A composition of rubbers manufactured to meet a specific standard and formed into a shape for application in a compression joint.
- Hydrostatic: Hydrostatic pressure is the pressure exerted by a fluid at equilibrium due to the force of gravity.
- Annular Space: The intentional void space within a joint between the parallel angled surfaces.
- Spigot: The part of the joint surface that extends out of the joint, the male end.
- Bell: The part of the joint surface that is inside the joint, the female end.
- Butyl: A hydrocarbon radical.
Sealant Selection
Materials
Sealants are typically designed to resist hydrostatic forces at a precast concrete joint to provide a watertight seal. The American Society of Testing and Materials (ASTM) specification C990 defines the required composition and performance testing requirements for preformed butyl sealants. Sealants that meet this standard will provide a reasonable level of assurance for performance in a hydrostatic conditions. Butyl rubber content and hydrocarbon content are synonymous terms.
Shape
A traditional misconception of preformed sealants is that wider is better. That is a myth. Preformed butyl rubber sealants work best at higher rates of compression. As the sealant is compressed, the resistance force for further compression increases as a function of the percentage of compression. Time and temperature, as well as the sealant composition, will affect this rate. For instance, the force (psi) to compress the sealant the initial 10% to 50% may range from 2psi to 4psi. But as the sealant reaches 75% compression, the resistance force is about 8psi, and at 85% compression, this reaches a force of about 12psi. As the sealant is compressed, the sealing gasket increases in width as it becomes thinner. This width increases the surface area of the applied force. As the area reaches a point of equilibrium with the designed resistance force of the sealant, compression will stop. The analogy best used is the use of snow shoes. As the area of the applied force is increased, the force per square inch is reduced. Thus enabling a person to walk on top of the snow.
Size / Volume
How much sealant is needed to seal the joint? The answer is as varied as the types and sizes of concrete castings being produced. There is no magic answer. Too little sealant may cause the joint to leak; too much sealant will be difficult to compress. The size of sealant required is determined by the volume needed to fill enough of the void to eliminate the possibility that a hydrostatic force will "push" the sealant. A minimum gasket width in the joint of 2"-3" is common, but a wider band is preferred. A maximum joint gap of 3/8" is recommended, but it is preferred that the joint be as tight as possible. A rule of thumb for finding the width after compression is to use this formula: (TF/P)/100, where TF=Total force applied in pounds, P=the length of the entire perimeter in feet. Example: 15,000 pounds of force is applied to a rectangular casting 10' x 5'. The perimeter is 30 feet. Calculate: (15,000/30)/100=5 Therefore, the sealant will compress to a nominal width of about 5". For box culverts, the net force must be determined by subtracting the force required to move the concrete section from the total force.
Placement
Sealant placement is critical in providing the best, water tight joint. Best practices are to place sealant in or near the annular space. On a box culvert, the best practice is to place some of the sealant on the bell in the angled surface along the bottom, and 6" above the center on each side. Continue placing the sealant on the spigot end of the mating piece on the angled surface along the top, and 6" below the center on each side.
Adhesion
The adhesion of the sealant to the concrete affects the hydrostatic resistance. Water can pass by sealant through the concrete by absorption if the joint surface is not properly prepared. This will result in wetness in or near the joint, opposite of the side of the joint where water is present. Sealant will adhere to a clean, dense, well cured concrete surface. To improve adhesion, primers can be used to create a surface that the sealant will adhere to. Primers can be in several forms: solvenated rubbers, glues, acrylics, or penetrating sealers. The manufacturer of the sealant can provide options that are best for the condition being treated.
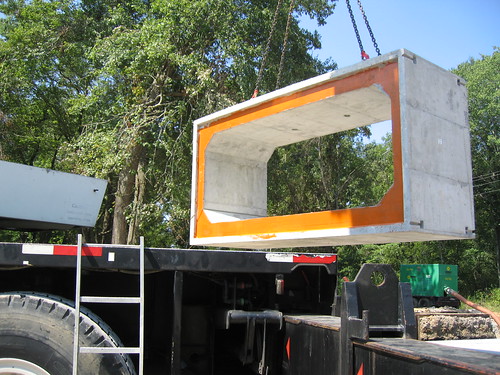
Applying the sealant tacky sealant before setting it in the hole saves time and makes the box culvert easier to work with. Photo courtesy of Barger Precast.
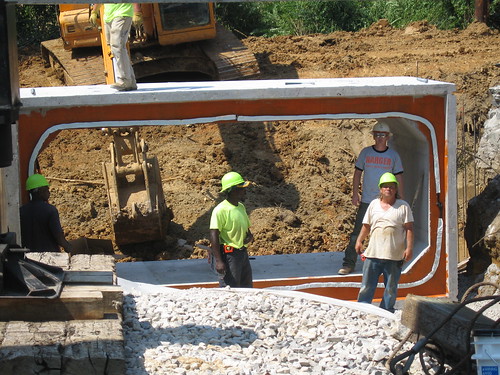
Sometimes the customer and field environment dictate how the sealant is placed. Not always an exact science. Photo courtesy of Barger Precast.
Box Culvert Sealing Options
Not every box culvert project has the same level of water tight requirement. Some box culverts are open on each end for water transportation through the sections. These units need to be sealed, but hydrostatic water tight performance is not critical. We consider the sealing method for these structures to be the Economical approach. Some box culverts need to control soil erosion around the joint, and the application of an external seal over the joint is necessary. We consider this the Erosion Control approach. Some box culverts are used as a water containment structure. In this application, watertight joints in a hydrostatic condition are critical. We consider this to be the Watertight approach.
Not every box culvert project has the same level of water tight requirement. Some box culverts are open on each end for water transportation through the sections. These units need to be sealed, but hydrostatic water tight performance is not critical. We consider the sealing method for these structures to be the Economical approach. Some box culverts need to control soil erosion around the joint, and the application of an external seal over the joint is necessary. We consider this the Erosion Control approach. Some box culverts are used as a water containment structure. In this application, watertight joints in a hydrostatic condition are critical. We consider this to be the Watertight approach.
Economical
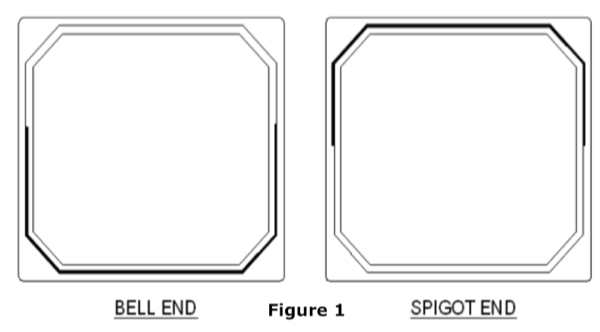
The economical approach is to use one row of sealant in the joint of sufficient size to be compressed a minimum of 50% and a minimum gasket of 2 ½” wide. The sealant is installed as shown in Figure 1.
The economical approach is to use one row of sealant in the joint of sufficient size to be compressed a minimum of 50% and a minimum gasket of 2 ½” wide. The sealant is installed as shown in Figure 1.
The above graphic courtesy of Concrete Sealant.
Erosion Control
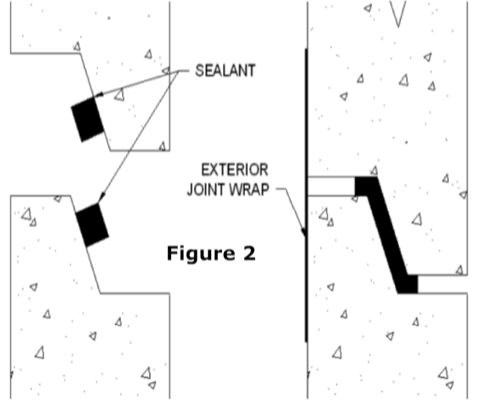
When the requirement states that the box culvert joints will be sealed and, in addition to sealant, the joints will be covered with an exterior membrane for preventing erosion. Sealant will be installed in accordance to Figure 1, and in addition to the sealant, and exterior joint wrap will be applied to the top and side joints of the box culvert. The exterior joint wrap is installed after placement as shown in Figure 2.
When the requirement states that the box culvert joints will be sealed and, in addition to sealant, the joints will be covered with an exterior membrane for preventing erosion. Sealant will be installed in accordance to Figure 1, and in addition to the sealant, and exterior joint wrap will be applied to the top and side joints of the box culvert. The exterior joint wrap is installed after placement as shown in Figure 2.
The above graphic courtesy of Concrete Sealant.
Watertight
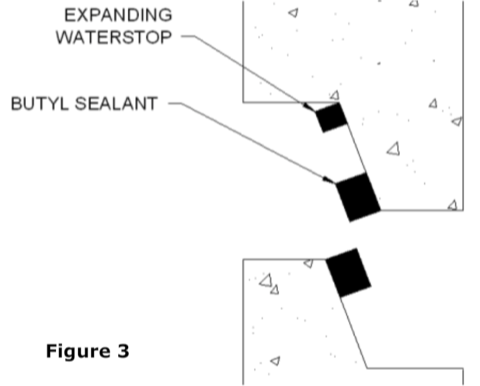
The economical and erosion control options may not provide a reasonable level of water tightness. Some box culverts are used for water storage tanks, cisterns, underground retention/detention, etc. These “Tunnel Tanks” must be water tight. Water tight means that there will not be any infiltration or exfiltration of water. To assure a water tight seal, two additional steps must occur. First, in addition to the butyl joint sealant, an expanding waterstop sealant will be installed around the perimeter of the spigot end. This sealant will expand as water from the exterior enters the joint, creating a secondary seal. Figure 3 indicates the method of installing the expanding waterstop sealant.
The economical and erosion control options may not provide a reasonable level of water tightness. Some box culverts are used for water storage tanks, cisterns, underground retention/detention, etc. These “Tunnel Tanks” must be water tight. Water tight means that there will not be any infiltration or exfiltration of water. To assure a water tight seal, two additional steps must occur. First, in addition to the butyl joint sealant, an expanding waterstop sealant will be installed around the perimeter of the spigot end. This sealant will expand as water from the exterior enters the joint, creating a secondary seal. Figure 3 indicates the method of installing the expanding waterstop sealant.
The above graphic courtesy of Concrete Sealant.
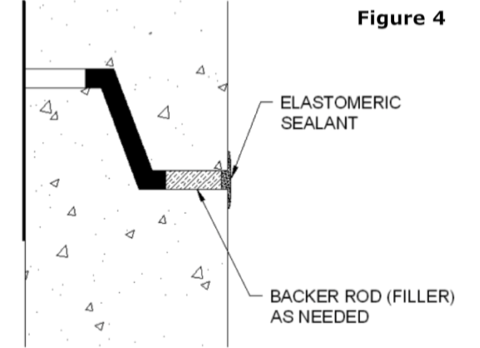
The second step in assuring a watertight joint is the use of an elastomeric sealing material conforming to ASTM C-920. This material will be caulked or troweled around the bottom and sides of each interior joint. Where the depth of fill exceeds ¼”, a backer rod shall be installed prior to caulking. Figure 4 shows this application.
The above graphic courtesy of Concrete Sealant.